This guide goes over setting up a very simple XR/VR project in Godot 4. It includes configuring the settings and nodes required for XR scenes. It does not cover topics like locomotion, hand configuration, or grabbing objects.
The basic requirements for running an XR project are:
- Enabling XR in the Project Settings
- Adding the XR nodes: XROrigin3D, XRCamera3D, and XrController3D
- Adding an XR script to initialize XR on launch
Watch the YouTube video tutorial here.
XR Project Settings
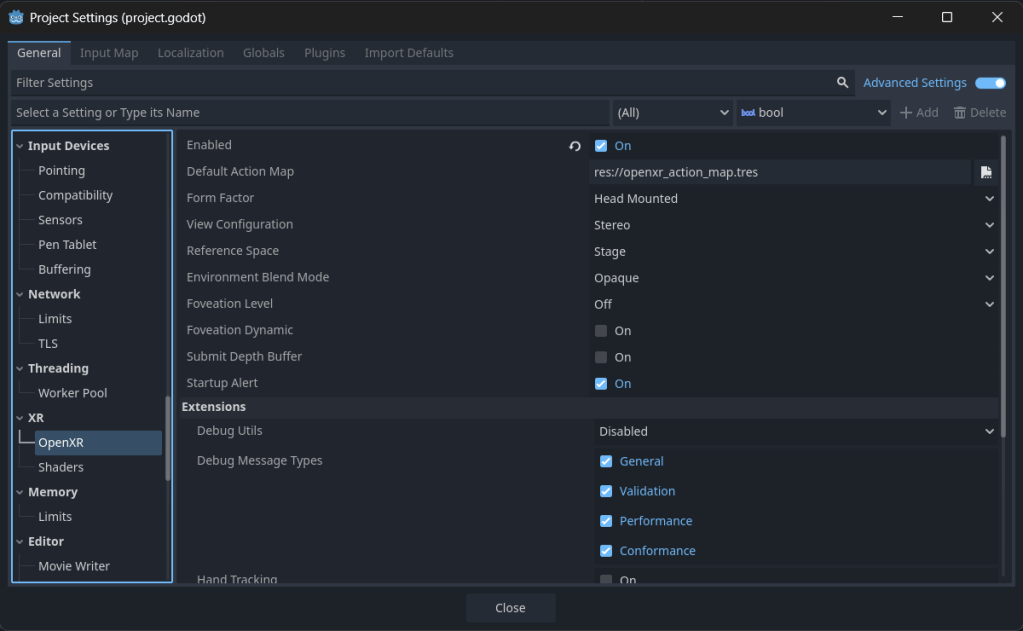
To get started, create a project, and in the Project Settings under the XR menu enable both OpenXR and Shaders by checking the Enabled box in each section.
Close the project and then reopen it after enabling these settings. Now you are ready to add the OpenXR nodes that allow for initializing and tracking VR equipment like headsets and controllers.
XR Nodes
There are three nodes that comprise the basic VR setup:
- XROrigin3D
- XRCamera3D
- XRController3D (one for each controller)
For now these can be added to a scene like a Node3D or CharacterBody3D, as we will not be configuring locomotion and do not need physics.
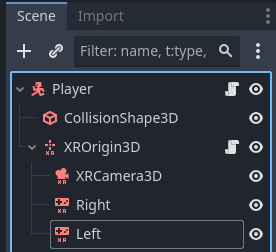
Add the XROrigin3D node to whichever scene you’ve created, and then nested within the XROrigin3D node add the XRCamera3D and two XRController3D nodes.
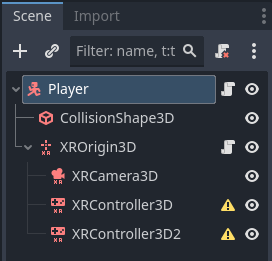
It is helpful to rename the XRController3D nodes “right” and “left” as you will need to define the Tracker property on each controller in order to enable motion tracking.
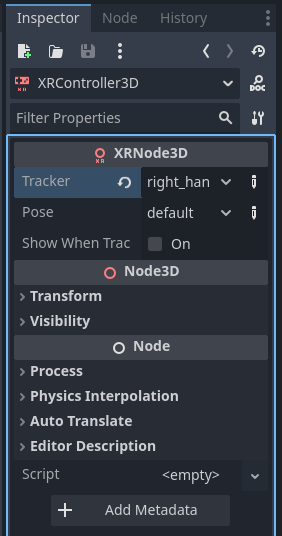
For your right controller select “right_hand” and for your left controller select “left_hand”. Your scene should now look something like this, with no warnings or exclamations:
You are now ready to add the XR script.
XR Script
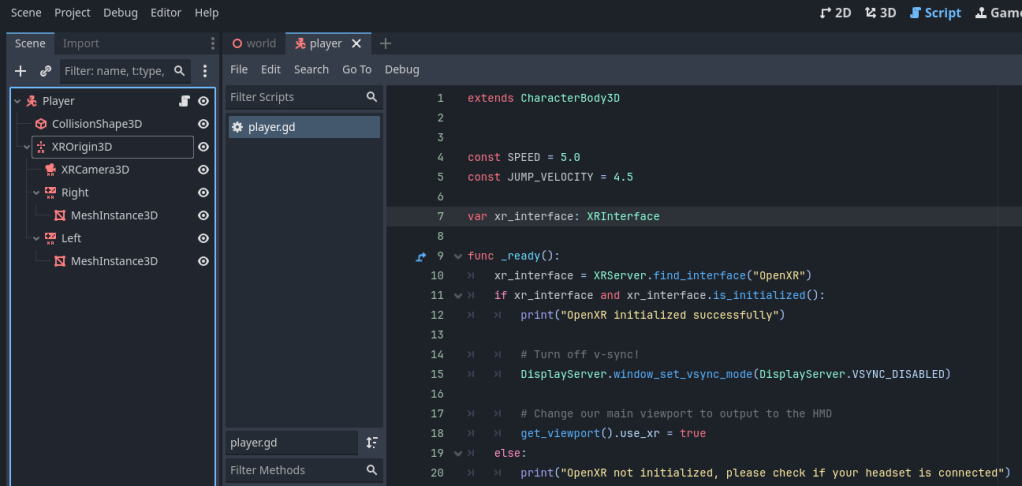
Once you have added the XR nodes and defined the left and right tracking on the controllers, you need to add a script to your scene that tells Godot to initialize OpenXR. It makes sense to copy this script into the scene containing the OpenXR nodes:
var xr_interface: XRInterface
func _ready():
xr_interface = XRServer.find_interface(“OpenXR”)
if xr_interface and xr_interface.is_initialized():
print(“OpenXR initialized successfully”)
# Turn off v-sync!
DisplayServer.window_set_vsync_mode(DisplayServer.VSYNC_DISABLED)
# Change our main viewport to output to the HMD
get_viewport().use_xr = true
else:
print(“OpenXR not initialized, please check if your headset is connected”)
Once you have the script added, you are ready to launch the scene. It is helpful to create a simple world scene with lighting and a floor so that you are able to look around to make sure the headset is tracking properly. Adding mesh instances (small spheres will work) to the controllers will also help you make sure that the right and left hands are tracking properly.
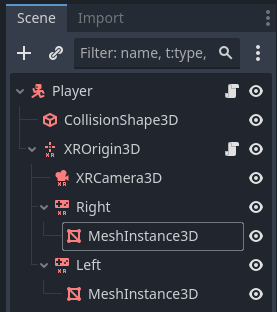
Adjust the size and transform of the meshes as needed so that they match where your hands should be. You won’t be able to do anything with them, but it is just a useful reference to explore using the controllers.
Conclusion
You should now have a headset that is displaying properly, as well as controllers that are tracking. Again these are the absolute basics of running Godot XR, there is likely much more you wish to do. I encourage you to explore what has been set up here, as well as other resources.
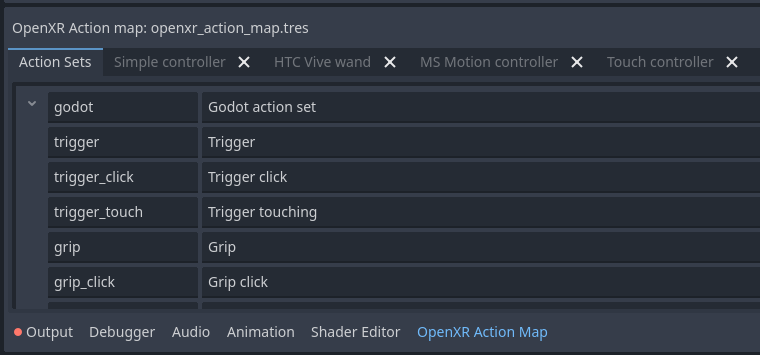
Take a look at our guide for configuring button input on your VR controllers here.
Also get more explanation and details from the Godot XR documentation here.